There are many different ways to back up your data. My preferred solution is to store backups on Amazon S3. It's cost-effective and straightforward to set up. First, you need an Amazon account if you don't already have one. Go to https://aws.amazon.com/s3/ and click Sign Up.
In this tutorial, we will set up a backup for a self-hosted Gitea server, but you can apply the same approach to other files you want to back up to S3.
Create Bucket 
After signing up, open the S3 web console. Create a new bucket, choose a bucket name, and select a region.
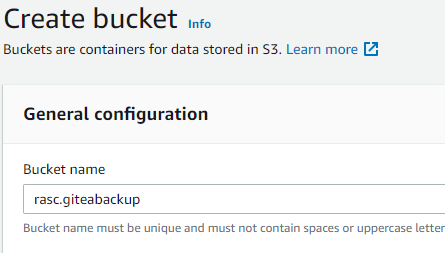
For this use case, the default bucket settings are fine. Ensure that the checkbox "Block all public access" is selected to prevent accidental public exposure of your backups.
Lifecycle rule 
I usually add a lifecycle rule that automatically transitions files after a few days from S3 Standard to an archive storage class. Today, AWS offers multiple archive classes (for example, S3 Glacier Instant Retrieval, S3 Glacier Flexible Retrieval, and S3 Glacier Deep Archive), each with different storage and retrieval costs. Archive classes are especially useful for backups because you rarely need to download them. Review the storage class documentation and pick the class that matches your restore-time requirements.
Adding a lifecycle rule only makes sense when you back up files that are versioned. For instance: backup-1.zip, backup-2.zip, backup-3.zip, or backup-20180601.tar.gz, backup-20180602.tar.gz. The lifecycle rule never applies if you always overwrite the same backup file.
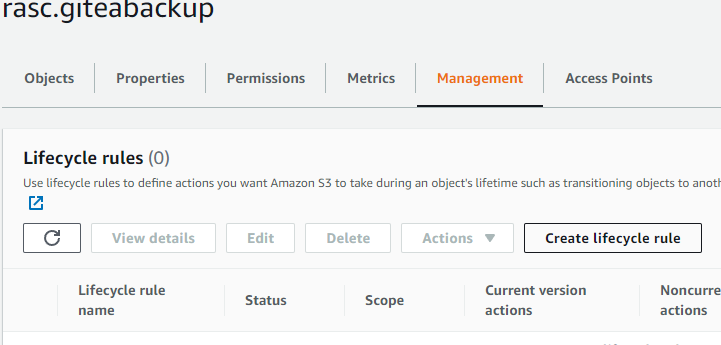
Click the bucket name, open the Management tab, and then click Create lifecycle rule.
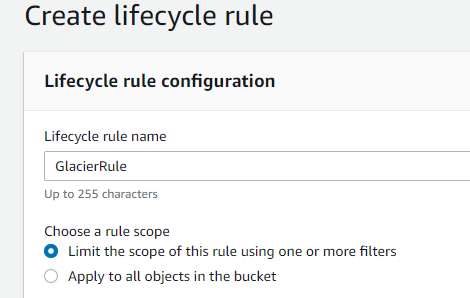
Enter a rule name.
Under Lifecycle rule actions, select the following options.
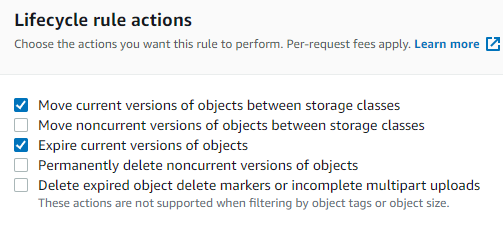
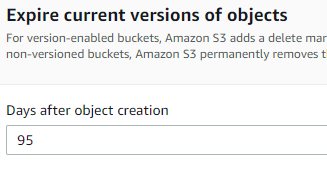
Under Expire current versions of objects, enter 95 days.
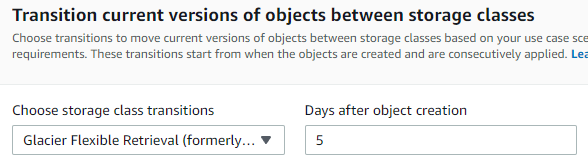
Under Transition, enter 5 days and select your preferred archive storage class.
Policy 
Next, create a policy. Open the IAM console, go to Policies, and create a new policy.
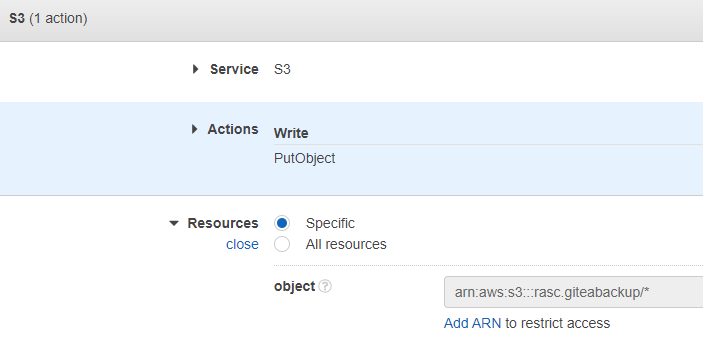
Select service S3. Under Actions allowed, select at least PutObject. Under Resources, specify the bucket that we created before, and make sure the object resource ends with /*.
If your backup tool also needs to list objects or use multipart uploads, add the required actions as well (for example, ListBucket and multipart-related permissions).
Review the policy, give it a name, and create it.
User 
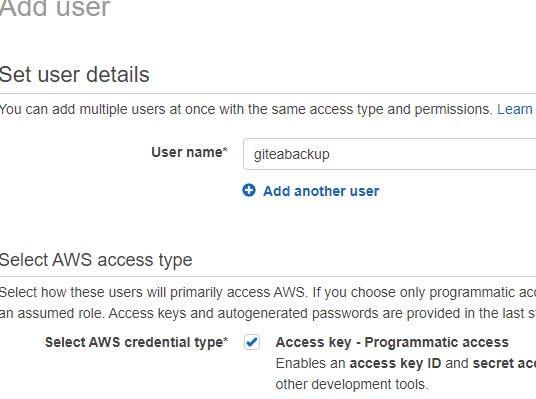
Go to Users and click Create user, then enter a username.
Then select Attach policies directly and attach the policy we created in the previous step.
After creating the user, open the user and create an access key under Security credentials. Under the section Access keys (0), click Create access key, select the Other option, and click Next. Add an optional description, and click Create access key.
Because this setup runs on an external host (not EC2), access keys are usually the practical authentication method. Use a dedicated IAM user for backups only, limit permissions to the target bucket, and rotate keys regularly.
Install tools 
I run all the following commands as root. If you are not logged in as root, prepend sudo to the commands or switch to root with sudo -i.
On the VPS, install s3cmd, a command-line client for Amazon S3.
apt install s3cmd
Create a dedicated s3cmd configuration file for this backup job:
s3cmd --configure --config=/root/.config/s3cmd-gitea.conf
chmod 600 /root/.config/s3cmd-gitea.conf
Upload an arbitrary file to verify that everything is set up correctly.
s3cmd --config=/root/.config/s3cmd-gitea.conf put /usr/local/bin/gitea s3://rasc.giteabackup
This keeps access keys out of shell history and script arguments.
Next, install gpg to encrypt backups. This protects backups from anyone who gains access to your S3 bucket. This is optional; if you do not need encrypted backups, you can skip this.
apt install gpg gpg-agent
We encrypt the backup with AES, a symmetric encryption algorithm. Here is an example of how to use gpg to encrypt and decrypt a text file.
gpg --cipher-algo AES256 --symmetric --batch --pinentry-mode loopback --passphrase the_passphrase test.txt
gpg --decrypt --batch --pinentry-mode loopback --passphrase the_passphrase -o test.txt -d test.txt.gpg
For production use, avoid putting the passphrase directly on the command line. Read it from a protected file or an environment variable.
Backup Gitea 
Gitea provides the dump command, which stores the configuration and repositories in a single zip file. We have to run the command as the git user.
cd /var/lib/gitea/
sudo -H -u git bash -c "/usr/local/bin/gitea -c /etc/gitea/app.ini dump -f backup.zip -w /var/lib/gitea"
With all pieces in place, we can create a shell script that runs dump, encrypts the file, and uploads it to S3.
cd /var/lib/gitea/
nano gitea-backup
Insert the following code, and replace the placeholders with your own values.
#!/bin/sh
set -eu
now=$(date +"%Y%m%dT%H%M")
cd /var/lib/gitea
sudo -H -u git bash -c "/usr/local/bin/gitea -c /etc/gitea/app.ini dump -f backup_${now}.zip -w /var/lib/gitea"
gpg --cipher-algo AES256 --symmetric --batch --pinentry-mode loopback --passphrase the_passphrase backup_${now}.zip
s3cmd --config=/root/.config/s3cmd-gitea.conf put backup_${now}.zip.gpg s3://rasc.giteabackup
rm /var/lib/gitea/backup_${now}.zip
rm /var/lib/gitea/backup_${now}.zip.gpg
Change the permissions so we can run it as a script.
chmod 755 gitea-backup
Test the script with ./gitea-backup. Then, visit the Amazon S3 web console and check if the file is stored in the bucket.
Setup systemd timer 
Next, install a scheduler to run this script periodically. We do this with systemd, which has a built-in timer service.
Create a timer file.
cd /var/lib/gitea
nano gitea-backup.timer
Add this code. It instructs systemd to run the backup script every day at 5:00 AM.
[Unit]
Description=Run gitea-backup once a day

[Timer]
OnCalendar=*-*-* 05:00:00
RandomizedDelaySec=30
Persistent=true

[Install]
WantedBy=timers.target
Create the corresponding service file.
nano gitea-backup.service
[Unit]
Description=gitea-backup

[Service]
WorkingDirectory=/var/lib/gitea
Type=oneshot
ExecStart=/var/lib/gitea/gitea-backup
Copy both files to /etc/systemd/system, then start and enable the timer so it automatically starts each time the server boots.
cp /var/lib/gitea/gitea-backup.timer /etc/systemd/system/gitea-backup.timer
cp /var/lib/gitea/gitea-backup.service /etc/systemd/system/gitea-backup.service
systemctl daemon-reload
systemctl start gitea-backup.timer
systemctl enable gitea-backup.timer
Check that the timer is installed.
systemctl list-timers
To test the service, run this command.
systemctl start gitea-backup