WireGuard is a VPN with a focus on simplicity and performance. In this blog post, we set up a WireGuard server on an Amazon Lightsail virtual server and connect an Android smartphone to the VPN.
Lightsail 
Lightsail is Amazon's easy-to-use cloud platform that offers virtual private servers (VPS), managed databases, storage, and networking for a predictable price. It's a great choice for people who need to get started quickly with cloud computing without dealing with the more complex Amazon Web Services (AWS) offerings.
Check out the pricing page for more information about the costs of running a Lightsail server.
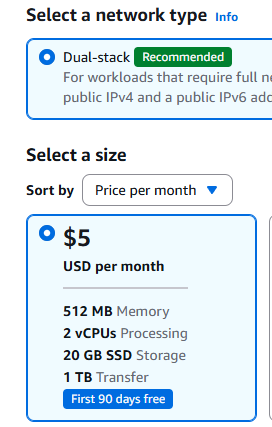
Lightsail supports Linux and Windows-based virtual servers. For this setup, create a Linux VPS. For a simple personal WireGuard server, the smallest Linux bundle with a public IPv4 address is usually sufficient. At the time of writing, that plan costs $5 per month and includes 2 virtual CPUs, 0.5 GB of RAM, 20 GB SSD storage, and 1 TB of data transfer per month.
If you want to follow this tutorial, you need an Amazon AWS account. To sign up, you can go to https://aws.amazon.com/ and click on the "Sign Up" button.
Setup VPS 
Go to https://lightsail.aws.amazon.com and sign in with your Amazon account.
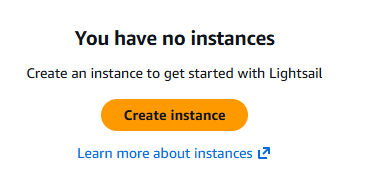
Click on Create instance.
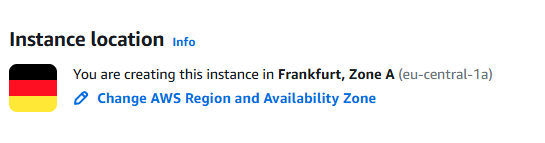
The creation process automatically selects a default region, in my case, eu-central-1a (Frankfurt).
You can change this if you want to create the server in a different location.
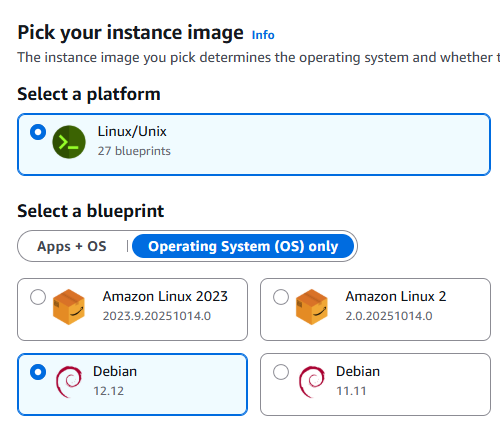
Select the operating system. Choose the newest Debian image available in Lightsail.
Next, we create a public/private key for connecting to the server with SSH. On your local computer, run this command:
ssh-keygen -N "mysupersecretpassphrase" -t ed25519 -C "<your_email>" -f lightsail
The passphrase (string after -N) protects your private key. Replace it with something else. Also replace the comment (string after -C) with your email address or any other text you want. This command creates two files in the current directory: a public key (lightsail.pub), and a private key (lightsail).
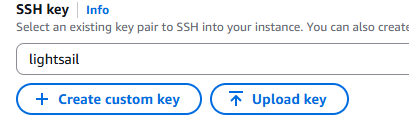
Under SSH key, click on "Upload key" and select the public key (lightsail.pub) you just created.
Next, choose the instance plan. The least expensive server is powerful enough for running WireGuard for personal use.
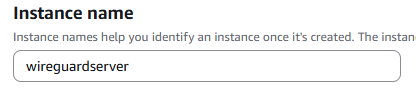
Give your instance a name and click on the Create instance button. Wait until the instance is running.
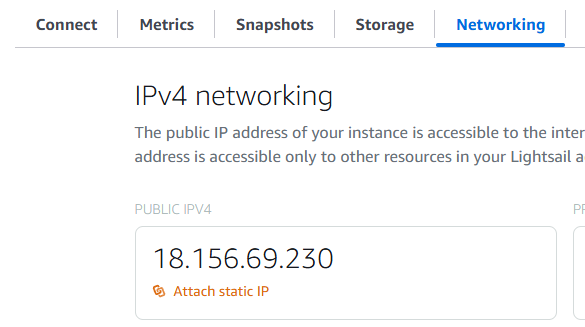
By default, Lightsail virtual servers get a new IP address each time you stop and start them. However, what we want is a static IP address that never changes. A static IP address for your server is included in the monthly fee.
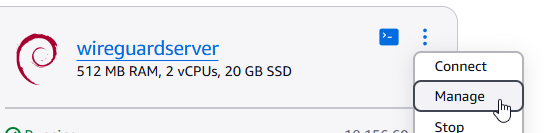
After your VPS is running, open the configuration dialog by clicking on Manage. Open the "Networking" tab and click on "Attach static IP".
Give the static IP address a unique name and click on Create and attach.
Under the IP address configuration, you can see the firewall settings. By default, Lightsail blocks all incoming traffic except for SSH (TCP port 22) and HTTP (TCP port 80). We don't need HTTP access for our VPN server, so delete this rule. Instead, add a new rule for UDP traffic on a random port. This port is where WireGuard listens for incoming VPN connections.
Click on Add rule, select "Custom" for the application, "UDP" for the protocol, and enter the port number. You can choose any free port you want. Usually, I pick a port between 32768 and 65535. For this blog post, I'm going to use port 54321. Click on Create
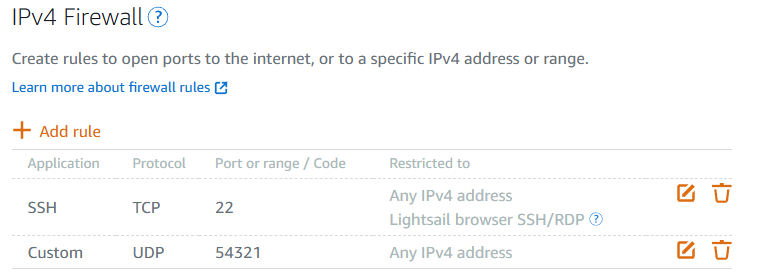
By default, the firewall configuration is copied to the IPv6 firewall as well. You can find these settings below the IPv4 firewall rules. Delete the port 80 rule from the IPv6 firewall.
That concludes the configuration of our virtual server. You can close the website, and we're going to continue on the command line.
Connect to the server 
Open an SSH connection to the new server. You need the private key file (lightsail) you created earlier and the static IP address of your server.
ssh -i lightsail admin@63.179.196.243
Enter the passphrase for the private key when prompted. If everything is correct, you should be connected to your new Lightsail server.
Install WireGuard 
Next, we install all the required packages for this tutorial: WireGuard, qrencode, and nftables.
sudo apt update
sudo apt install wireguard qrencode nftables
Next, we need to enable IPv4 forwarding. This change allows the server to forward network packets between different network interfaces, which is essential for routing traffic from VPN clients to the internet. This tutorial uses IPv4 for client internet access.
sudo nano /etc/sysctl.d/99-local.conf
Add the following content to the file:
# Enable IPv4 packet forwarding
net.ipv4.ip_forward = 1
Save and close the file. To apply the changes immediately, run:
sudo sysctl --system
Verify that IP forwarding is enabled. This command should return 1.
cat /proc/sys/net/ipv4/ip_forward
Finally, clean up the system by removing packages that are no longer needed.
sudo apt autoremove
Next, configure nftables for forwarding and NAT.
sudo nano /etc/nftables.conf
Replace the file content with:
#!/usr/sbin/nft -f

flush ruleset

table inet filter {
  chain forward {
    type filter hook forward priority 0;
    policy drop;

    iifname "wg0" accept
    oifname "wg0" ct state related,established accept
  }
}

table inet nat {
  chain postrouting {
    type nat hook postrouting priority srcnat;

    oifname "ens5" ip saddr 192.168.2.0/24 masquerade
  }
}
Verify that your default internet-facing interface is called ens5. You can do this by running ip route show default and looking for the interface name after dev. If it is different, replace ens5 in /etc/nftables.conf with the correct interface name.
Load the rules and enable nftables at boot.
sudo nft -f /etc/nftables.conf
sudo systemctl enable --now nftables
Set up WireGuard 
WireGuard uses public/private key cryptography. For that, we need to create a public/private key pair for each participant of the VPN. In this setup, we have the server and one Android phone, so we create two key pairs.
I run all the following commands as the root user.
sudo -i
cd /etc/wireguard/
umask 077
wg genkey | tee server_private.key | wg pubkey > server_public.key
wg genkey | tee client_private.key | wg pubkey > client_public.key
SERVER_PRIVATE_KEY=$(<server_private.key)
SERVER_PUBLIC_KEY=$(<server_public.key)
CLIENT_PRIVATE_KEY=$(<client_private.key)
CLIENT_PUBLIC_KEY=$(<client_public.key)
WG_PORT=54321
PUBLIC_ENDPOINT=63.179.196.243
If your public IP address, DNS name, or WireGuard port are different, adjust PUBLIC_ENDPOINT and WG_PORT before creating the configuration files.
Create the file wg0.conf.
cat > wg0.conf <<EOF
[Interface]
Address = 192.168.2.1/24
PrivateKey = ${SERVER_PRIVATE_KEY}
ListenPort = ${WG_PORT}
SaveConfig = false

[Peer]
PublicKey = ${CLIENT_PUBLIC_KEY}
AllowedIPs = 192.168.2.2/32
EOF
For the WG_PORT variable, you need to use the same port number that you specified in the UDP firewall rule on the Lightsail configuration page. This is the port where WireGuard is listening for incoming VPN connections.
Check the wg0.conf file.
cat wg0.conf
It should look similar to this:
[Interface]
Address = 192.168.2.1/24
PrivateKey = cMgbJqIl6CuU6U6gpXu4TwUlJ+TnAgaSa6Dc8b5g1F8=
ListenPort = 54321
...

[Peer]
PublicKey = GXehejiGNxfOk5bEKECYgQg0nM9cu80BxPJap47s3QE=
AllowedIPs = 192.168.2.2/32
Next, start the WireGuard wg0 network interface and enable it so Linux automatically brings
it up each time the system boots.
wg-quick up wg0
systemctl enable wg-quick@wg0.service
When you list all network interfaces with ip a, you should see the WireGuard interface.
3: wg0: <POINTOPOINT,NOARP,UP,LOWER_UP> mtu 8921 qdisc noqueue state UNKNOWN group default qlen 1000
    link/none
  inet 192.168.2.1/24 scope global wg0
       valid_lft forever preferred_lft forever
Client Setup 
If you want to connect from an Android phone to a WireGuard server, you need to install the WireGuard app from the Play Store: https://play.google.com/store/apps/details?id=com.wireguard.android&hl=en
Create a new configuration in the app. You can do this either from scratch by entering all the information manually, by importing a file, or by scanning a QR code. In this tutorial, we use the QR code option: create the configuration file on the server, display a QR code, and then scan it with the app.
First, create the configuration file. I call it phone.conf in this example.
cat > phone.conf <<EOF
[Interface]
Address = 192.168.2.2/24
PrivateKey = ${CLIENT_PRIVATE_KEY}
DNS = 1.1.1.1, 1.0.0.1

[Peer]
PublicKey = ${SERVER_PUBLIC_KEY}
Endpoint = ${PUBLIC_ENDPOINT}:${WG_PORT}
AllowedIPs = 0.0.0.0/0
PersistentKeepalive = 25
EOF
Make sure that the Endpoint points to the public static IP address or DNS name of your virtual server. The port must be the same as ListenPort in the wg0.conf file. If you have multiple clients, make sure that Address is free and not already assigned to another client.
In this example, I use the Cloudflare DNS servers (1.1.1.1 and 1.0.0.1). You can change this to any DNS server you want. PersistentKeepalive = 25 helps keep the connection alive when the phone is behind NAT or a mobile network.
Run the following command to display the QR code of the phone.conf file content.
qrencode -t ansiutf8 < phone.conf
Open the WireGuard app on your Android phone, tap the + button, select "Scan from QR code," and then point the camera at the QR code on your screen. If the app scans the code successfully, it asks for a tunnel name. Enter a name and tap "Create tunnel". Enable the tunnel with the slider.
To check if the VPN works, open a browser and go to the URL: https://www.whatismyip.com/
If the connection is routed through the VPN, it should show the external IP address of the virtual server.
Additional clients 
If you want to connect more clients, repeat the client setup.
- Generate a public/private key pair.
- Create a client configuration file. Make sure
Addressis not already assigned. - Add a new
[Peer]section towg0.conf. - Restart the
wg0interface.systemctl restart wg-quick@wg0 - Display the QR code and scan it with the app.
This concludes the tutorial about installing WireGuard on an Amazon Lightsail virtual server and connecting an Android smartphone to the VPN.