When you add Spring Security to a Spring Boot application, by default, you get a session-based authentication system. Spring Security handles login and logout requests and stores information about the logged-in user in the HTTP session of the underlying web server (Tomcat, Jetty, or Undertow). To track which session belongs to which client, the web server sets a cookie with a random session ID and stores the session object in memory. Each time the browser sends a request to the server, it sends the session cookie along, and the server retrieves the session object related to the session ID. Spring Security then picks up the authentication object from the session and checks whether the user can access a specific endpoint or call a method.
This approach works fine if you run only one instance of your Spring Boot application. However, as soon as you need to run multiple instances of the same application to handle all incoming traffic, you face a problem. If a user logs in on one instance, Spring Security stores the authentication object in the session store of that instance. As long as the client sends subsequent requests to the same instance, everything works fine, but if it sends HTTP requests to another instance, they will be rejected because that instance does not know about the existing session in the other instance.
Fortunately, there are solutions to this problem. When you have a load balancer running in front of these instances, you can configure it so that HTTP requests with a session cookie are always sent to the instance that created the cookie. This way, you don't have to change anything in your application and can use sessions stored in memory.
Another solution is to store the session objects in a central data store or distribute them to all running application instances with a multicast library. This way, every application instance has access to all session information, and it does not matter if the client logs in on one instance and later requests go to another instance.
This post implements the shared data store approach. If you want a production-ready project for this use case, check out Spring Session. For this example, however, we are going to implement the core idea from scratch.
Stateless 
Stateless, in this context, means that we don't store any information about the logged-in user in memory. However, we still need to store information about the logged-in user somewhere and associate it with a client. In this example, we will store session information in a database table and store the primary key to this information in a cookie.
As a demo application, I created an Angular/Ionic application with a login page where users log in with their email and password. The client architecture does not matter much here because the focus of this post is the Spring Security configuration. The same server-side approach works with any client-side framework.
Note that using cookies makes your application potentially vulnerable to CSRF attacks. The following example uses the SameSite cookie attribute as one layer of defense. SameSite is broadly supported in modern browsers, but if you still need to support legacy browsers that ignore it, you should add an additional CSRF defense.
To see which browsers currently support the SameSite attribute, visit:
https://caniuse.com/#search=same-site
Spring Security Configuration 
Database 
The example application uses two database tables: app_user and app_session.
CREATE TABLE app_user (
    id            BIGINT NOT NULL AUTO_INCREMENT,
    email         VARCHAR(255) NOT NULL,
    password_hash VARCHAR(255),
    authority     VARCHAR(255),
    enabled       BOOLEAN NOT NULL,
    PRIMARY KEY(id),
    UNIQUE(email)
);

CREATE TABLE app_session (
    id            CHAR(35)  NOT NULL,
    app_user_id   BIGINT    NOT NULL,
    valid_until   TIMESTAMP NOT NULL DEFAULT CURRENT_TIMESTAMP,
    PRIMARY KEY(id),
    FOREIGN KEY (app_user_id) REFERENCES app_user(id) ON DELETE CASCADE
);
The app_user table stores the login information (email and password) and the user's role (authority). With the enabled field, we can disable a user and prevent them from accessing the application.
The application stores the session information in the app_session table. A user can have multiple sessions. The primary key will be stored in the cookie, so we use a string as the key. The field valid_until contains the date when the session expires.
The following demo application uses jOOQ and an H2 database.
Password Encoder 
To hash passwords, we configure a DelegatingPasswordEncoder that currently uses an Argon2PasswordEncoder as the default encoder.
  PasswordEncoder passwordEncoder() {
    String defaultEncodingId = "argon2";
    Map<String, PasswordEncoder> encoders = new HashMap<>();
    encoders.put(defaultEncodingId, Argon2PasswordEncoder.defaultsForSpringSecurity_v5_8());
    return new DelegatingPasswordEncoder(defaultEncodingId, encoders);
  }
We also need to add the Bouncy Castle provider, which the Argon2 password encoder depends on.
    <dependency>
      <groupId>org.bouncycastle</groupId>
      <artifactId>bcprov-jdk18on</artifactId>
      <version>1.84</version>
    </dependency>
Login 
We are not using Spring Security's built-in username/password authentication flow in this example. Instead, we expose our own /login endpoint and still rely on Spring Security for authorization and for protecting backend services.
The login handler receives a JSON payload with the user's email and password, validates it, and verifies the credentials.
  @PostMapping(path = "/login", consumes = MediaType.APPLICATION_JSON_VALUE)
  public ResponseEntity<String> login(@Valid @RequestBody LoginRequest loginRequest) {

    AppUserRecord appUserRecord = this.dsl.selectFrom(APP_USER)
        .where(APP_USER.EMAIL.eq(loginRequest.email())).fetchOne();

    if (appUserRecord != null) {
      boolean pwMatches = this.passwordEncoder.matches(loginRequest.password(),
          appUserRecord.getPasswordHash());
      if (pwMatches && appUserRecord.getEnabled().booleanValue()) {

        String sessionId = this.tokenService.createToken();

        AppSessionRecord record = this.dsl.newRecord(APP_SESSION);
        record.setId(sessionId);
        record.setAppUserId(appUserRecord.getId());
        record.setValidUntil(
            LocalDateTime.now().plus(this.appProperties.getCookieMaxAge()));
        record.store();

        ResponseCookie cookie = ResponseCookie
            .from(AuthCookieFilter.COOKIE_NAME, sessionId)
            .maxAge(this.appProperties.getCookieMaxAge()).sameSite("Strict").path("/")
            .httpOnly(true).secure(this.appProperties.isSecureCookie()).build();

        return ResponseEntity.ok().header(HttpHeaders.SET_COOKIE, cookie.toString())
            .body(appUserRecord.getAuthority());
      }
    }
    else {
      this.passwordEncoder.matches(loginRequest.password(),
          this.userNotFoundEncodedPassword);
    }

    return ResponseEntity.status(HttpStatus.UNAUTHORIZED).build();
  }
The method fetches the user from the database and compares the passwords. If the login information is valid, it inserts a new record into the app_session table and creates the authentication cookie with the primary key as the value. Note that we set SameSite=Strict on the cookie as one mitigation against CSRF attacks.
If you want to learn more about the SameSite attribute, the MDN documentation is a good starting point:
https://developer.mozilla.org/en-US/docs/Web/HTTP/Headers/Set-Cookie/SameSite
We set the HttpOnly attribute to prevent JavaScript code from accessing the cookie. If your site in production is accessible over TLS (and it should be), you should also set the Secure attribute. This instructs the browser to send this cookie only over HTTPS and never over an unsecured HTTP connection.
If you want to learn more about Cookies and their attributes, visit this MDN page: https://developer.mozilla.org/en-US/docs/Web/HTTP/Headers/Set-Cookie
The login method finally sends the user's role (authority) back in the response body.
Note that the password encoder should be configured so that the check runs for about one second. If the endpoint receives a request for a user that is not stored in the database, we need to make sure that the method's runtime stays roughly the same by doing an artificial password check.
If the login fails, the method returns a 401 HTTP response status.
Authentication check 
Besides the login endpoint, we also add a simple endpoint that clients can call to check whether a user is already logged in.
  @GetMapping("/authenticate")
  @PreAuthorize("isFullyAuthenticated()")
  public String authenticate(@AuthenticationPrincipal AppUserDetail user) {
    return user.getAuthorities().iterator().next().getAuthority();
  }
Unauthenticated requests to this endpoint result in a 401 HTTP response code; otherwise, it sends back the user's role in the response body.
Our client app uses this endpoint to decide whether it needs to present the login page.
Authentication and Principal objects 
We are not using Spring Security's authentication flow here, but we still rely on Spring Security's authorization system. For that, we need an Authentication and a principal object.
public class UserAuthentication implements Authentication {
Our custom implementation holds a reference to the principal object (AppUserDetail) and implements the required Authentication interface methods.
As a principal, you can use any object you want. We are going to use the following class. It is just a holder for the user information.
public class AppUserDetail {

  private final Long appUserId;

  private final String email;

  private final boolean enabled;

  private final Set<GrantedAuthority> authorities;
Later in the application, you can inject this principal object with the @AuthenticationPrincipal into an HTTP endpoint.
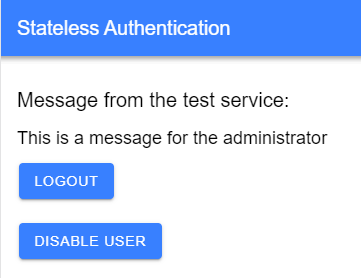
  @GetMapping("/message")
  @PreAuthorize("isAuthenticated()")
  public String message(@AuthenticationPrincipal AppUserDetail user) {
    if ("admin@test.com".equals(user.getEmail())) {
      return "This is a message for the administrator";
    }
    return "This is a message for all users";
  }
We will see these two classes in action further below when implementing the authentication filter.
Stateless 
Now we start with the main Spring Security configuration.
cust -> cust.sessionCreationPolicy(SessionCreationPolicy.STATELESS))
First, we set the session creation policy to STATELESS. This does not disable session management in the underlying web server; instead, it instructs Spring Security not to create or use an HTTP session for storing the SecurityContext.
CSRF 
.csrf(CsrfConfigurer::disable).logout(cust -> {
We are disabling CSRF protection here because the demo uses a SameSite cookie and keeps the frontend and backend on the same origin during development. That is acceptable for a focused demo, but SameSite alone should be treated as defense in depth, not as a universal replacement for CSRF protection. If you need stronger protection or must support older browsers, a cookie-based CSRF token setup is a better fit for stateless clients, for example:
.csrf(cust -> cust.csrfTokenRepository(CookieCsrfTokenRepository.withHttpOnlyFalse()))
Visit the official Spring Security documentation to read more about CSRF protection.
Logout 
cust.logoutSuccessHandler(this.logoutSuccessHandler);
We use Spring Security's /logout endpoint. The client sends a POST request to this URL, and Spring Security deletes the authentication cookie and calls a custom logout success handler.
  private static class CustomLogoutSuccessHandler implements LogoutSuccessHandler {

    private final DSLContext dsl;

    public CustomLogoutSuccessHandler(DSLContext dsl) {
      this.dsl = dsl;
    }

    @Override
    public void onLogoutSuccess(HttpServletRequest request, HttpServletResponse response,
        Authentication authentication) throws IOException {

      String sessionId = AuthCookieFilter.extractAuthenticationCookie(request);
      if (sessionId != null) {
        this.dsl.delete(APP_SESSION).where(APP_SESSION.ID.eq(sessionId)).execute();
      }

      response.setStatus(HttpServletResponse.SC_OK);
      response.getWriter().flush();
    }

  }
This handler is responsible for deleting the session information from the app_session table.
The problem here is that we cannot rely on users to log out correctly. As a result, session information might stay in the app_session table for a while. To prevent that, we install a scheduled method that periodically deletes expired records. The authentication filter also checks valid_until on every request so that expired sessions are rejected immediately instead of staying valid until the cleanup job runs.
  @Scheduled(cron = "0 0 5 * * *")
  public void doCleanup() {
    this.dsl.delete(APP_SESSION).where(APP_SESSION.VALID_UNTIL.le(LocalDateTime.now()))
        .execute();
  }
Exception Handler 
        .exceptionHandling(cust -> cust
            .authenticationEntryPoint(new HttpStatusEntryPoint(HttpStatus.UNAUTHORIZED)))
The Spring Security exception handler is called whenever the client tries to reach a secure endpoint without a valid authentication.
For browser-oriented applications, the default behavior is often a redirect to or a rendered login page, which is not helpful for a Single Page Application. Therefore, we configure a custom handler to return the 401 status code.
AuthCookieFilter 
This filter is crucial for the authorization system to work. Every request to a secured HTTP endpoint flows through this filter. It extracts the session information from the cookie, loads the matching row from app_session, verifies that the session has not expired yet, and then loads the user information.
public class AuthCookieFilter extends OncePerRequestFilter {
When the filter finds a valid record in the app_session table, it creates the principal object (AppUserDetail) and the authentication object (UserAuthentication) and puts them into the security context. Spring Security's authorization system then picks up the objects from there.
Note that this filter poses a bottleneck because every incoming HTTP request to a secured endpoint runs through this code. The filter caches the database lookup result for a short time (1 minute) to mitigate this problem. However, do not cache for too long because you lose the ability to change a user's role, disable the user, or expire a session immediately.
We configure this filter in the central security configuration. Here, we need to ensure that this filter runs very early in the filter chain. So we insert it after the SecurityContextHolderFilter, one of the first filters in the chain.
.addFilterAfter(this.authCookieFilter, SecurityContextHolderFilter.class);
Lastly, we need to tell Spring Security which endpoints are secure and which are publicly available.
        }).authorizeHttpRequests(cust -> {
          cust.requestMatchers("/login").permitAll().anyRequest().authenticated();
        })
In our example, only /login is accessible without authentication.
Client 
The demo client application is written with Angular and Ionic. This section shows a few key parts of the client application.
Guard 
When the user navigates to http://localhost:8100, the app redirects to http://localhost:8100/home, and this path is protected by an Angular route guard.
The guard first checks if the user is already logged in. The isLoggedIn() method checks if the client has either already called the /authenticate or /login endpoint.
  canActivate(): Observable<boolean | UrlTree> | Promise<boolean | UrlTree> | boolean | UrlTree {
    if (this.authService.isLoggedIn()) {
      return true;
    }

    return this.authService.isAuthenticated().pipe(
      map((authenticated) => {
        if (authenticated) {
          return true;
        }
        return this.router.createUrlTree(['/login']);
      }),
    );
  }
Because the client has no access via JavaScript to the authentication cookie (HttpOnly), it has to send a request to the /authenticate endpoint to check the presence and validity of the cookie.
  isAuthenticated(): Observable<boolean> {
    return this.httpClient.get(`/authenticate`, { responseType: 'text' }).pipe(
      map((response) => this.handleAuthResponse(response)),
      catchError(() => of(false)),
    );
  }
/authenticate sends back the HTTP status code 401 when the user is not logged in. In that case, the AuthGuard redirects to /login and presents the login page to the user. If /authenticate returns HTTP 200, the response body contains the user's authority, which is then stored in the client app. Later calls to this.authService.isLoggedIn() return true.
Login 
The login page presents a form to the user, and when they click the login button, the application sends a POST request to the server with the email and password as JSON in the request body.
  login(email: string, password: string): Observable<boolean> {
    return this.httpClient.post('/login', { email, password }, { responseType: 'text' }).pipe(
      map((response) => this.handleAuthResponse(response)),
      catchError(() => of(false)),
    );
  }
Like /authenticate, the /login endpoint returns either HTTP 401 for an unsuccessful login or HTTP 200 and the user authority in the response body.
Logout 
The client sends a POST request to /logout to log out a user. The application displays the login page if this call is successful.
  logout(): Observable<void> {
    return this.httpClient
      .post<void>('/logout', null)
      .pipe(tap(() => this.authoritySubject.next(null)));
  }
The /logout endpoint takes care of deleting the authentication cookie.
Example application 

You can find the complete source for the server and client on GitHub in this repository: https://github.com/ralscha/blog2019/tree/master/stateless
To run it locally, you need Node.js and a current JDK. The refreshed sample currently targets Spring Boot 4 on Java 25 on the server side and Angular 21 with Ionic 8 components on the client side. You no longer need the Ionic CLI just to start the client.
To start the client, install the dependencies and run the Angular development server:
cd client
npm install
npm start
You can start the server from either inside an IDE or from the command line with the following command:
cd server
./mvnw spring-boot:run
On Windows, use mvnw.cmd spring-boot:run instead.
The server sets up two demo users:
| Password | Authority | |
|---|---|---|
| admin@test.com | admin | ADMIN |
| user@test.com | user | USER |
You can verify that the server does not store any authentication state in memory. Open the application in the browser, log in with a user, restart the Spring Boot application, and then refresh the page in the browser. You should still be logged in.
Proxy 
The development environment needs an additional configuration step because the Angular development server and Spring Boot run on different origins by default. You can certainly make that work with explicit CORS configuration and credentialed requests, but for a local demo it is usually simpler to expose everything through one origin.
To solve that, we use an Angular development proxy that forwards selected requests to Spring Boot. This keeps the browser talking to a single origin during development and makes cookie handling straightforward.
Create a JSON file in the project's root with an arbitrary name and add all the URLs you want to forward to another server.
{
  "/login": {
    "target": "http://localhost:8080",
    "secure": false
  },
Then open angular.json and add a proxyConfig configuration inside the serve.options object that points to the proxy configuration file.
          "options": {
            "proxyConfig": "proxy.conf.json",
            "buildTarget": "app:build"
          },
With this configuration in place, we can now send all requests to localhost:8100, and any request that matches an entry in the proxy configuration file will be internally redirected to localhost:8080.