In this blog post, we are going to explore the Web Workers API. First, we will look at the problem Web Workers solve and why they matter. Then, we will build a few examples with plain JavaScript. In the second part, we will look at Angular CLI support for Web Workers and then at Comlink, a library that hides most of the low-level messaging boilerplate.
You can find the source code for all the examples on my GitHub account:
https://github.com/ralscha/blog2019/tree/master/webworkers
Problem 
JavaScript applications run on a single main thread with an event loop. We do not usually have to deal with shared-memory locking in the browser, but we do need to make sure that long-running work does not block the event loop. If it does, the application cannot process callbacks, repaint the UI, or react to user input. The tab effectively freezes.
See the MDN page for more information about the Event Loop:
https://developer.mozilla.org/en-US/docs/Web/JavaScript/Event_loop
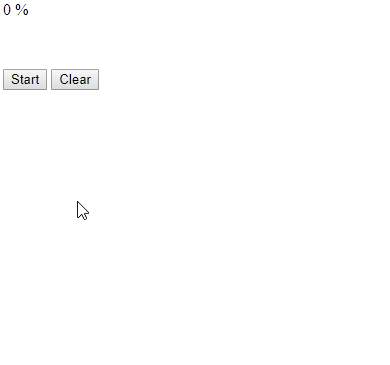
But what if we have to run a CPU-intensive algorithm in the browser? The following application runs the Mandelbrot set algorithm and draws the famous fractal into a canvas.
const myCanvas = document.getElementById('myCanvas');
const ctx = myCanvas.getContext('2d');
ctx.fillStyle = 'black';

const timeElement = document.getElementById('time');
const progressElement = document.getElementById('progress');
let progress = 0;

const height = myCanvas.height;
const width = myCanvas.width;
const maxIteration = 20000;
const totalPixels = height * width;

document.getElementById('startButton').addEventListener('click', () => {
  progressElement.innerText = '0 %';
  ctx.clearRect(0, 0, myCanvas.width, myCanvas.height);
  timeElement.innerText = 'working...';
  performance.clearMarks();
  performance.clearMeasures();
  performance.mark('start-mandelbrot');

  drawMandelbrotSet();

  performance.mark('end-mandelbrot');
  performance.measure('mandelbrot', 'start-mandelbrot', 'end-mandelbrot');
  timeElement.innerText = performance.getEntriesByName('mandelbrot')[0].duration + 'ms';
  progressElement.innerText = '100 %';
});

document.getElementById('clearButton').addEventListener('click', () => {
  progressElement.innerText = '0 %';
  timeElement.innerHTML = ' ';
  ctx.clearRect(0, 0, myCanvas.width, myCanvas.height);
});

function drawMandelbrotSet() {
  for (let iy = 0; iy < height; iy++) {
    for (let ix = 0; ix < width; ix++) {
      const cRe = (ix - width / 2.0) * 4.0 / width;
      const cIm = (iy - height / 2.0) * 4.0 / width;
      let x = 0;
      let y = 0;

      let iteration = 0;
      while (x * x + y * y <= 4 && iteration < maxIteration) {
        const xNew = x * x - y * y + cRe;
        y = 2 * x * y + cIm;
        x = xNew;
        iteration++;
      }
      if (iteration >= maxIteration) {
        ctx.fillRect(ix, iy, 1, 1);
      }
      progress++;
    }
    progressElement.innerText = progress * 100 / totalPixels + ' %';
  }
}
This algorithm runs for a few seconds and blocks the event loop during that time. We immediately see the effect: the UI stops updating. The start button stays in the pressed state, the progress text is not updated, and nothing is drawn on the canvas.
As soon as the algorithm finishes, the event loop is free again and the UI catches up. The Mandelbrot set appears, and the progress field finally updates.
Web Workers 
We have seen the problem. Fortunately, the browser has a solution for this: the Web Workers API.
Web Workers allow a JavaScript application to run code in background threads. These worker threads can perform tasks without blocking the event loop.
Visit the MDN page for more information about Web Workers:
https://developer.mozilla.org/en-US/docs/Web/API/Web_Workers_API/Using_web_workers
Basic Usage 
Let's start with a simple example. We will create a worker that adds two numbers together. First, we create two JavaScript files: main.js and worker.js. The worker code has to live in a separate file.
The code in main.js, which runs on the main thread, creates and starts the worker. You create a Web Worker
with a Worker object and pass the path to the worker script. That script then runs in a background thread.
const worker = new Worker('worker.js');
worker.addEventListener('message', message => {
  console.log('result: ' + message.data);
});

worker.postMessage({ a: 1, b: 2 });
worker.postMessage({ a: 3, b: 6 });
worker.postMessage({ a: 4, b: 4 });
self.addEventListener('message', messageEvent => {
  const data = messageEvent.data;
  const result = data.a + data.b;
  postMessage(result);
});
You can run a lot of code inside a worker, with some important limitations. The biggest one is that a worker cannot access the DOM. Other browser features, such as the Web Storage API, are not available there either.
MDN maintains a list of APIs that are available to Web Workers:
https://developer.mozilla.org/en-US/docs/Web/API/Web_Workers_API/Functions_and_classes_available_to_workers
For example, a worker can issue HTTP requests, open WebSocket connections, and access IndexedDB. In the last part of this post, we will build an example that downloads data and stores it in IndexedDB.
Workers and the main application run in different contexts. The worker cannot directly access variables or functions from the main thread, and the main thread cannot directly access worker state. They communicate by sending messages.
Both sides can send messages with postMessage(), and both sides can listen for the message event.
The payload is stored in the event's data property.
By default, the browser sends message payloads with the structured clone algorithm. For large payloads, that copying step can become expensive.
Later in this article, we will look at transferables, where ownership of an ArrayBuffer moves to the receiver instead of cloning the underlying data.
In our simple example, both the main application and the worker register a message handler.
The main application then sends three messages with postMessage(). The worker receives them one by one, adds the two numbers,
and sends the result back with another postMessage() call.
The main thread receives the result in its message handler and prints it to the console.
You are not limited to a single Worker. You can create multiple workers from the same script or from different scripts.
In a later example, we will start several workers with the same Mandelbrot code.
The Web Worker interface also provides worker.terminate() to stop a worker immediately.
This does not wait until the worker finishes its current task.
If you want to run the code again, you need to create a new Worker instance.
Make sure that you serve your HTML pages over HTTP or HTTPS. Web Workers do not work when you open a page directly with the file:// scheme.
For the plain JavaScript examples, I use local-web-server and add a small npm script.
{
  "name": "basic",
  "version": "1.0.0",
  "scripts": {
    "start": "ws -d . -p 1234"
  },
  "devDependencies": {
    "local-web-server": "5.4.0"
  }
}
With this package.json in place, npm start serves the current directory.
Run Mandelbrot in a Web Worker 
Back to our Mandelbrot set example. We want to move the heavy computation into a worker.
First, we create a new JavaScript file that contains the Mandelbrot algorithm and register a message handler.
On the worker side, the message event contains the width, height, and maxIteration values sent by the main thread.
After the worker receives the message, it starts the algorithm.
self.addEventListener('message', messageEvent => {
  computeMandelbrotSet(messageEvent.data);
});

function computeMandelbrotSet({ width, height, maxIteration }) {
  for (let iy = 0; iy < height; iy++) {
    for (let ix = 0; ix < width; ix++) {
      const cRe = (ix - width / 2.0) * 4.0 / width;
      const cIm = (iy - height / 2.0) * 4.0 / width;
      let x = 0;
      let y = 0;

      let iteration = 0;
      while (x * x + y * y <= 4 && iteration < maxIteration) {
        const xNew = x * x - y * y + cRe;
        y = 2 * x * y + cIm;
        x = xNew;
        iteration++;
      }
      if (iteration >= maxIteration) {
        postMessage([ix, iy]);
      }
    }
  }
  postMessage(null);
}
Remember that the worker cannot update the DOM, so it cannot draw on the canvas directly.
Instead, it sends the result back with postMessage(). In this first version, the worker sends one message per pixel that belongs to the Mandelbrot set.
The final postMessage(null) marks the end of the computation.
In the main application, we call postMessage(), the counterpart to the message handler above.
Here, we send the height, width, and maxIteration values to the worker.
worker.postMessage({ height, width, maxIteration });
Before we can use the worker, we create it and register an event listener that receives the results from the background thread.
Inside that listener, the application draws the pixels on the canvas with fillRect().
When the worker sends back null, the application knows that the computation is finished.
const worker = new Worker('mandelbrot.js');
worker.addEventListener('message', message => {
  const data = message.data;
  if (data !== null) {
    ctx.fillRect(data[0], data[1], 1, 1);
    progress = data[0] + (data[1] * width);
    progressElement.innerText = Math.round(progress * 100 / totalPixels) + ' %';
  } else {
    performance.mark('end-mandelbrot');
    performance.measure('mandelbrot', 'start-mandelbrot', 'end-mandelbrot');
    timeElement.innerText = performance.getEntriesByName('mandelbrot')[0].duration + 'ms';
    progressElement.innerText = '100 %';
  }
});
This works: the main thread stays responsive. But it is not very smooth, and it takes longer than the blocking version. The reason is the large number of cross-thread messages. Messaging overhead becomes noticeable when we send a message for every single pixel.
To improve this, we send fewer messages. Instead of calling postMessage() for every pixel, the worker batches the pixels in an array.
Whenever the array reaches 1000 elements, it sends the whole batch to the main thread.
function computeMandelbrotSet({ width, height, maxIteration }) {
  let batch = [];
  for (let iy = 0; iy < height; iy++) {
    for (let ix = 0; ix < width; ix++) {
      const cRe = (ix - width / 2.0) * 4.0 / width;
      const cIm = (iy - height / 2.0) * 4.0 / width;
      let x = 0;
      let y = 0;

      let iteration = 0;
      while (x * x + y * y <= 4 && iteration < maxIteration) {
        const xNew = x * x - y * y + cRe;
        y = 2 * x * y + cIm;
        x = xNew;
        iteration++;
      }
      if (iteration >= maxIteration) {
        batch.push([ix, iy]);
        if (batch.length === 1000) {
          postMessage(batch);
          batch = [];
        }
      }
    }
  }

  if (batch.length > 0) {
    postMessage(batch);
  }

  postMessage(null);
The main application only needs a small change: it now loops over the batch and draws all received pixels.
worker.addEventListener('message', message => {
  const data = message.data;
  if (data !== null) {
    for (let i = 0; i < data.length; i++) {
      ctx.fillRect(data[i][0], data[i][1], 1, 1);
    }
    const last = data[data.length - 1];
    progress = last[0] + (last[1] * width);
    progressElement.innerText = Math.round(progress * 100 / totalPixels) + ' %';
This version runs much more smoothly and takes about the same time as the original blocking version.
Multiple Web Workers 
So far, we have used only one worker. The Mandelbrot algorithm is a good candidate for parallelization because each pixel can be computed independently. The calculation does not need information from neighboring pixels, and there is no shared mutable state across the whole image. That makes it straightforward to split the work across multiple workers.
In the following example, the application creates four workers, all loading the same JavaScript file (mandelbrot-multi.js).
For a production application, you would usually derive the worker count from navigator.hardwareConcurrency, but a fixed number keeps the example predictable.
for (let w = 0; w < numberOfWorkers; w++) {
  workers[w] = new Worker('mandelbrot-multi.js');
I am using a simple approach here. The canvas is divided into tiles of 100 by 100 pixels. The main application creates the workers and assigns one tile to each worker to get the computation started.
  for (let w = 0; w < numberOfWorkers; w++) {
    workers[w].postMessage({
      startX: workX,
      startY: workY,
      width: 100,
      height: 100,
      totalWidth: width,
      totalHeight: height,
      maxIteration
    });
    workX += 100;
    if (workX === width) {
      workY += 100;
      workX = 0;
    }
  }
The global variables workX and workY keep track of the next tile.
Each worker processes one tile in parallel and sends the result back with postMessage().
self.addEventListener('message', messageEvent => {
  computeMandelbrotSet(messageEvent.data);
});

function computeMandelbrotSet({ startX, startY, width, height, totalWidth, totalHeight, maxIteration }) {
  const result = [];
  for (let iy = startY; iy < startY + height; iy++) {
    for (let ix = startX; ix < startX + width; ix++) {
      const cRe = (ix - totalWidth / 2.0) * 4.0 / totalWidth;
      const cIm = (iy - totalHeight / 2.0) * 4.0 / totalWidth;
      let x = 0;
      let y = 0;

      let iteration = 0;
      while (x * x + y * y <= 4 && iteration < maxIteration) {
        const xNew = x * x - y * y + cRe;
        y = 2 * x * y + cIm;
        x = xNew;
        iteration++;
      }
      if (iteration >= maxIteration) {
        result.push([ix, iy]);
      }
    }
  }
  postMessage(result);
}
In the main application, every worker has its own message handler. Whenever a worker finishes a tile, the listener draws the result and either assigns the next tile or records that the worker is done.
  workers[w].addEventListener('message', message => {
    const data = message.data;
    for (let i = 0; i < data.length; i++) {
      ctx.fillRect(data[i][0], data[i][1], 1, 1);
    }

    const last = data[data.length - 1];
    if (last) {
      progress = last[0] + (last[1] * width);
      progressElement.innerText = Math.round(progress * 100 / totalPixels) + ' %';
    }

    if (workY < height) {
      workers[w].postMessage({
        startX: workX,
        startY: workY,
        width: 100,
        height: 100,
        totalWidth: width,
        totalHeight: height,
        maxIteration
      });

      workX += 100;
      if (workX === width) {
        workY += 100;
        workX = 0;
      }
    } else {
      endCounter++;
      if (endCounter === numberOfWorkers) {
        performance.mark('end-mandelbrot');
        performance.measure('mandelbrot', 'start-mandelbrot', 'end-mandelbrot');
        timeElement.innerText = performance.getEntriesByName('mandelbrot')[0].duration + 'ms';
        progressElement.innerText = '100 %';
      }
    }
  });
In the event handler, the application draws the pixels onto the canvas and checks workX and workY to see whether more tiles are available.
If more work is available, it sends the coordinates of the next tile to the same worker.
We do not have to worry about concurrent access to these bookkeeping variables because the main application still runs on a single-threaded event loop. The message handlers execute one after another.
If there are no more tiles, the application increments endCounter. Once it matches the number of workers, we know the whole image is finished and can print the elapsed time.
Transfer messages 
As mentioned earlier, message payloads are structured-cloned by default. In these examples, that is acceptable because the batches are small. But once messages become large, cloning increases both runtime and memory usage.
For these cases, postMessage() accepts a second argument: the transfer list. That list tells the browser to transfer ownership of specific transferable objects instead of cloning them.
After the transfer, the sender no longer owns the transferred object.
Transferable objects include ArrayBuffer, MessagePort, and ImageBitmap.
To demonstrate this, the next example wraps the result in a Uint16Array and transfers its buffer.
  const message = new Uint16Array(result);
  console.log('before', message.buffer.byteLength);
  postMessage(message, [message.buffer]);
  console.log('after', message.buffer.byteLength);
The log statements show the ownership change. After postMessage(), the sender's ArrayBuffer is detached and its byte length becomes 0.
In this demo, the performance difference is small. The main benefit is avoiding a second allocation for the copied data.
The main application also has to change because it now receives a Uint16Array instead of an array of tuples.
The code uses an iterator to walk through the x/y coordinate pairs.
  workers[w].addEventListener('message', message => {
    const data = message.data;
    const arrayIterator = data.values();
    let result = arrayIterator.next();
    let x;
    let y;
    while (!result.done) {
      x = result.value;
      y = arrayIterator.next().value;
      ctx.fillRect(x, y, 1, 1);
      result = arrayIterator.next();
    }

    if (x) {
      progress = x + (y * width);
      progressElement.innerText = Math.round(progress * 100 / totalPixels) + ' %';
Angular support for Web Workers 
After the plain JavaScript examples, let's shift focus to Angular. The programming model does not change, but Angular CLI can configure worker builds for you and bundle the worker separately.
That is one of the practical challenges of Web Worker development. As soon as a worker imports other code, you need a build step that produces a separate worker bundle.
With Angular CLI support in place, you can write worker code in TypeScript, import other modules, and let the build handle the worker bundle.
You can add worker support to an Angular application created with ng new by running ng generate web-worker app or another location under src/app.
The first run configures the project for workers and creates the worker TypeScript configuration if it is not already present.
Later runs only scaffold additional .worker.ts files.
You can create as many worker source files as you need, as long as each one has a unique name.
You can find an Angular version of the Mandelbrot set example here:
https://github.com/ralscha/blog2019/tree/master/webworkers/angular/src/app
The code is almost the same as the plain JavaScript version, with one important difference in worker creation. Angular uses the modern URL-based worker constructor so the build can track the worker as a dependency.
    this.workers = [];
    for (let w = 0; w < this.numberOfWorkers; w++) {
      this.workers[w] = new Worker(new URL('./mandelbrot.worker', import.meta.url), {
        type: 'module',
The call uses new URL('./mandelbrot.worker', import.meta.url) together with { type: 'module' }, which matches the module worker bundle produced by the Angular build.
Notice that the path does not include the .ts suffix. The worker source is TypeScript, but the browser ultimately loads the generated JavaScript bundle.
If your Angular application also runs with server-side rendering, make sure you provide a fallback path because Web Workers are only available in the browser.
Comlink 
In all the examples so far, setting up the messaging layer required a bit of manual code. That is manageable for small demos, but the complexity grows once you exchange multiple message types or expose several operations.
There are many JavaScript libraries available that simplify this programming model. In this blog post, we will take a closer look at Comlink.
Comlink is a small library that hides the messaging infrastructure behind proxies and exposes the worker code as an asynchronous API.
Because Comlink relies on JavaScript Proxy, it targets modern browsers.
Let's start with a plain Web Worker example. In this demo application, we calculate the Fibonacci sequence and return the number at the requested index.
The plain worker version looks just like the basic examples earlier in this post: create a worker, listen for the response, and start the calculation with postMessage().
Because the worker script is imported as a module, Vite can emit a separate worker bundle for production builds.
  const worker = new PlainWorker();
  writeOutput('\u00a0');
  worker.addEventListener('message', ({data}) => {
    writeOutput(data);
    worker.terminate();
  }, {once: true});
  worker.postMessage(1000);
}
self.addEventListener('message', messageEvent => {
  const result = fibonacci(messageEvent.data);
  postMessage(result);
});

function fibonacci(num) {
  let a = 1;
  let b = 0;

  while (num >= 0) {
    const temp = a;
    a = a + b;
    b = temp;
    num--;
  }

  return b;
}
Next, we implement the same example with Comlink. We remove the explicit message listeners and import Comlink in the worker and the main application.
Because Comlink is imported as a module in both places, the example uses Vite and imports the workers with the ?worker suffix. Vite turns these imports into worker constructors and makes sure the build emits separate worker assets.
Inside the worker, we call expose() with the function we want to make available to the main thread.
import {expose} from 'comlink';

function fibonacci(num) {
  let a = 1;
  let b = 0;

  while (num >= 0) {
    const temp = a;
    a = a + b;
    b = temp;
    num--;
  }

  return b;
}

expose(fibonacci);
On the other side, the main application still creates a worker, but now it wraps the worker with wrap(). wrap() is the counterpart to expose().
  const worker = new ComlinkWorker();
  const fibonacci = wrap(worker);
  writeOutput('\u00a0');

  try {
    const result = await fibonacci(1000);
    writeOutput(result);
  } finally {
    fibonacci[releaseProxy]();
    worker.terminate();
  }
}
wrap() returns a proxy to the worker function, but all access is asynchronous. A synchronous function inside the worker therefore becomes a Promise-returning function in the main thread.
Comlink simplifies the programming model significantly. Under the hood, the main application and the worker still exchange messages, but our code can work with the worker almost like any other Promise-based API.
Like the plain Web Workers API, Comlink clones values by default. It also supports transferables with Comlink.transfer().
See the project page for more information about this topic:
https://github.com/GoogleChromeLabs/comlink#comlinktransfervalue-transferables-and-comlinkproxyvalue
Another useful feature is Comlink.proxy. It lets you send a proxy for an object to the other side.
This is especially handy for callback functions because functions are neither structured-cloneable nor transferable.
In the following example, we send not only the Fibonacci index but also a proxied callback that updates the page.
  const worker = new ComlinkProxyWorker();
  const fibonacci = wrap(worker);

  try {
    await fibonacci(1000, proxy(writeOutput));
  } finally {
    fibonacci[releaseProxy]();
    worker.terminate();
  }
}
In the worker code, the fibonacci function receives the proxied writeOutput callback as a second argument.
Instead of returning one final value, it calls the callback for every step.
import {expose} from 'comlink';

async function fibonacci(num, outputFunction) {
  let a = 1;
  let b = 0;

  await outputFunction('\u00a0');

  while (num >= 0) {
    const temp = a;
    a = a + b;
    b = temp;
    num--;
    await outputFunction(b);
  }

}

expose(fibonacci);
Visit the Comlink project page for more information:
https://github.com/GoogleChromeLabs/comlink
Mandelbrot set with Angular and Comlink 
In this example, we combine the ideas from the previous sections and build an Angular application that draws the Mandelbrot set with Comlink-backed workers.
This is a port of the Angular Mandelbrot application from the previous section. The only difference is that it uses Comlink instead of manual postMessage() calls.
The project uses Angular CLI worker support and a dedicated mandelbrot.worker.ts file.
Inside the worker, the Mandelbrot algorithm is implemented as a regular function that returns a value. The worker then exposes it with Comlink.
import * as Comlink from 'comlink';

function computeMandelbrotSet({
  startX,
  startY,
  width,
  height,
  totalWidth,
  totalHeight,
  maxIteration,
}: {
  startX: number;
  startY: number;
  width: number;
  height: number;
  totalWidth: number;
  totalHeight: number;
  maxIteration: number;
}): number[][] {
  const result = [];
  for (let iy = startY; iy < startY + height; iy++) {
    for (let ix = startX; ix < startX + width; ix++) {
      const cRe = ((ix - totalWidth / 2.0) * 4.0) / totalWidth;
      const cIm = ((iy - totalHeight / 2.0) * 4.0) / totalWidth;
      let x = 0;
      let y = 0;

      let iteration = 0;
      while (x * x + y * y <= 4 && iteration < maxIteration) {
        const xNew = x * x - y * y + cRe;
        y = 2 * x * y + cIm;
        x = xNew;
        iteration++;
      }
      if (iteration >= maxIteration) {
        result.push([ix, iy]);
      }
    }
  }
  return result;
}

Comlink.expose(computeMandelbrotSet);
In the main application, we create the worker and wrap it with wrap().
    for (let w = 0; w < this.numberOfWorkers; w++) {
      this.workers[w] = new Worker(new URL('./mandelbrot.worker', import.meta.url), {
        type: 'module',
      });
      this.computeMandelbrotSetMethods[w] = wrap(this.workers[w]);
    }
With this in place, the main application can call the exposed computeMandelbrotSet function.
The worker implementation is synchronous, but the wrapped version returns a Promise in the main thread.
  async work(computeMandelbrotSetMethod: Remote<ComputeMandelbrotSetMethod>): Promise<void> {
    while (this.workY < this.height) {
      const result = await computeMandelbrotSetMethod({
        startX: this.workX,
        startY: this.workY,
        width: 100,
        height: 100,
        totalWidth: this.width,
        totalHeight: this.height,
        maxIteration: this.maxIteration,
      });

      for (const point of result) {
        this.ctx.fillRect(point[0], point[1], 1, 1);
      }

      const last = result[result.length - 1];
      if (last) {
        this.progress.set(
          Math.round(((last[0] + last[1] * this.width) * 100) / this.totalPixels) + ' %',
        );
      }

      this.workX += 100;
      if (this.workX === this.width) {
        this.workY += 100;
        this.workX = 0;
      }
    }
  }
Web Worker example with Ionic/Angular and Comlink 
In this last section, we will look at a more business-like example. The application displays earthquakes from the previous month. It downloads CSV data from usgs.gov, parses it with Papa Parse, and stores it in IndexedDB with Dexie.js. All of that work happens inside a Web Worker.
The application is based on the Ionic blank starter template. I added Comlink, Papa Parse, and Dexie.js to the project.
npm install comlink
npm install papaparse
npm install dexie
Then I added worker support with Angular CLI and created earthquakes-loader.worker.ts.
First, we create the Earthquake interface and EarthquakeDb Dexie object. See also my blog post about Dexie.js if you want to know more about IndexedDB with Dexie.js: https://blog.rasc.ch/2018/01/Using-Dexie-js-in-a-TypeScript-application.html
import Dexie from 'dexie';

export class EarthquakeDb extends Dexie {
  earthquakes!: Dexie.Table<Earthquake, string>;

  constructor() {
    super('Earthquake');
    this.version(1).stores({
      earthquakes: 'id,mag,time',
    });
  }
}

export interface Earthquake {
  id: string;
  time: number;
  place: string;
  mag: number;
  depth: number;
  latLng: [number, number];
}
In the worker, we import Comlink, Papa Parse, and the Dexie wrapper.
import { parse } from 'papaparse';
import { Earthquake, EarthquakeDb } from './earthquake-db';
import { expose } from 'comlink';
Because Angular CLI bundles the worker separately, the worker can import whatever it needs.
The worker exposes a plain object with two asynchronous methods: one loads new records, and the other deletes old ones. That keeps the worker API small and easy to consume from the main thread.
const earthquakesLoader = {
  async load(url: string): Promise<void> {
    const response = await fetch(url);
    if (!response.ok) {
      throw new Error(`Unable to download earthquake feed: ${response.status}`);
    }

    const text = await response.text();
    const data = parse<EarthquakeRow>(text, { header: true, skipEmptyLines: true });

    const earthquakes: Earthquake[] = [];

    for (const row of data.data) {
      if (row.id) {
        earthquakes.push({
          time: new Date(row.time).getTime(),
          place: row.place,
          mag: Number(row.mag),
          depth: Number(row.depth),
          latLng: [Number(row.latitude), Number(row.longitude)],
          id: row.id,
        });
      }
    }

    await db.transaction('rw', db.earthquakes, async () => {
      await db.earthquakes.bulkPut(earthquakes);
    });
  },

  async deleteOldRecords(): Promise<void> {
    const thirtyDaysAgo = Date.now() - 30 * 24 * 60 * 60 * 1000;
    await db.earthquakes.where('time').below(thirtyDaysAgo).delete();
  },
};

expose(earthquakesLoader);
In the main application, we create a worker, wrap it with Comlink, and call the exposed methods directly. The service does not have to deal with message listeners or explicit message types.
      const earthquakesLoader: Remote<EarthquakesLoaderApi> = wrap<EarthquakesLoaderApi>(worker);

      try {
        await earthquakesLoader.load(url);
        console.log('records loaded');
        localStorage.setItem('lastUpdate', Date.now().toString());

        await earthquakesLoader.deleteOldRecords();
        console.log('old records deleted');
      } finally {
        earthquakesLoader[releaseProxy]();
        worker.terminate();
      }

      this.changeSubject.next();
    }
  }
The two methods, load and deleteOldRecords, are already asynchronous in the worker, so the remote API maps naturally to await on the main thread.
For synchronous worker functions, remember that Comlink still exposes them as Promise-returning methods.
This concludes the journey through the Web Workers API. It is a practical way to move CPU-heavy or I/O-heavy work off the main thread. With Angular CLI support, it is straightforward to write workers in TypeScript and bundle imported dependencies. And with Comlink, the programming model becomes much more pleasant because the low-level messaging details disappear behind a Promise-based API.
The source code for all the examples is hosted on GitHub:
https://github.com/ralscha/blog2019/tree/master/webworkers