In this blog post, I show you how to present your holiday photos on Google Maps. We will develop an application that presents the user with a Google Map and displays markers at the positions where the photos were taken. Instead of the usual marker icons, the application shows a thumbnail of the photo. When the user clicks on a marker, the picture is displayed in full-screen mode.
The finished project is a static website in the sense that it does not require any server-side processing. You can host the application with any static hosting service.
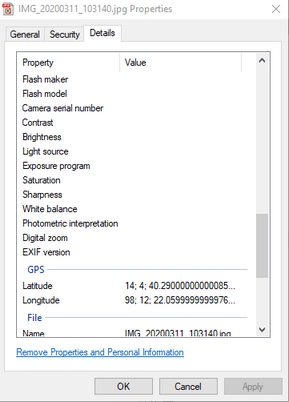
One requirement for this project is that you have a collection of photos with embedded location information. On Windows, you can check this by right-clicking a file and opening Properties.
1. Extract Metadata and Generate Thumbnails 
The first thing we need to do is extract the location data and create a JSON file. The JavaScript application we are going to build needs this information to display the markers on Google Maps.
We also need a thumbnail image for each photo. We could load the original photo into the marker. The browser would automatically scale the picture down to the size of the marker, but that would be a waste of bandwidth, especially when the map displays many markers. So instead, we are going to create small thumbnail images.
These two tasks are handled by a Java application. Note that you only need to run this application once. After that, the application is no longer needed to run the finished project. There is no server-side processing involved in displaying the map.
The metadata-extractor library provides classes and methods to extract metadata from image files.
    <dependency>
      <groupId>com.drewnoakes</groupId>
      <artifactId>metadata-extractor</artifactId>
      <version>2.20.0</version>
    </dependency>
Because Java does not have a built-in JSON library, I added the following JSON-P library to my project.
    <dependency>
      <groupId>org.glassfish</groupId>
      <artifactId>jakarta.json</artifactId>
      <version>2.0.1</version>
    </dependency>
For creating thumbnails, I added the Thumbnailator library.
    <dependency>
      <groupId>net.coobird</groupId>
      <artifactId>thumbnailator</artifactId>
      <version>0.4.21</version>
    </dependency>
With these three libraries in place, the following code creates the thumbnails and the JSON file.
  private static void extractMetadata(JsonGenerator jg, Path photoDir,
      Path thumbnailDir) throws IOException {
    Files.list(photoDir).forEach(photo -> {
      try (InputStream is = Files.newInputStream(photo)) {
        Metadata metadata = ImageMetadataReader.readMetadata(is);

        GpsDirectory gpsDirectory = metadata
            .getFirstDirectoryOfType(GpsDirectory.class);

        ExifIFD0Directory directory = metadata
            .getFirstDirectoryOfType(ExifIFD0Directory.class);
        Date date = directory.getDate(ExifDirectoryBase.TAG_DATETIME);

        if (gpsDirectory != null) {
          GeoLocation geoLocation = gpsDirectory.getGeoLocation();
          if (geoLocation != null && !geoLocation.isZero()) {
            if (!Files.exists(thumbnailDir.resolve(photo.getFileName()))) {
              Thumbnails.of(photo.toFile()).size(36, 36)
                  .toFiles(thumbnailDir.toFile(), Rename.NO_CHANGE);
            }

            jg.writeStartObject();
            jg.write("lat", geoLocation.getLatitude());
            jg.write("lng", geoLocation.getLongitude());
            jg.write("img", photo.getFileName().toString());
            if (date != null) {
              jg.write("ts", (int) (date.getTime() / 1000));
            }
            jg.writeEnd();
            jg.flush();
          }
        }
      }
      catch (IOException | ImageProcessingException e) {
        e.printStackTrace();
      }

    });

  }
The program iterates over each photo, extracts the latitude, longitude, and timestamp, and writes the data as JSON into a text file.
The JSON file we get from this program looks like this:
[
   {
    "lat":14.081791666666666,
    "lng":98.20677222222223,
    "img":"IMG_20200311_102648.jpg",
    "ts":1583922409
    },
    ...
]
Creating thumbnails with the Thumbnailator library is a one-liner where you specify the path to the source file, the target size, and the output file. The size() method creates images that fit within a rectangle of a specified size and preserves the aspect ratio of the original image. So the result of this operation is a new image with either a width or a height of 36 pixels.
              Thumbnails.of(photo.toFile()).size(36, 36)
                  .toFiles(thumbnailDir.toFile(), Rename.NO_CHANGE);
That concludes the pre-processing of our photo library. We now have a JSON file and a collection of thumbnails. Let's continue with the web application.
2. Project Setup 
Set up a new JavaScript project with Vite. Run the following command in the terminal and follow the prompts to create a new project.
npm create vite@latest
Install the following dependencies.
npm install vite esbuild -D
npm install @googlemaps/js-api-loader @googlemaps/markerclusterer date-fns
npm install lightgallery.js lg-autoplay.js lg-fullscreen.js lg-zoom.js
The Google Maps loader loads the Maps JavaScript API from code, the MarkerClusterer package groups many photo markers, and lightGallery provides the fullscreen image viewer.
Create vite.config.js in the project root.
import { defineConfig } from 'vite';

export default defineConfig({
  base: './',
  root: 'src',
  publicDir: 'public',
  server: {
    host: 'localhost',
    open: true
  },
  preview: {
    open: true
  },
  build: {
    outDir: '../dist',
    emptyOutDir: true,
    sourcemap: false,
    cssMinify: 'esbuild',
    assetsDir: 'assets'
  }
});
The important detail here is that Vite uses src as the application root and copies everything from src/public into the build output unchanged.
Create the directory structure and copy the assets into the project.
- Create
srcandsrc/public/assets. - Copy
photos.jsonintosrc/public/assets. - Copy the thumbnails into
src/public/assets/thumbnails. - Copy the original photos into
src/public/assets/images.
Inside the src folder, create the files index.html, main.css, and main.js.
<!DOCTYPE html>
<html lang="en">

<head>
  <meta charset="utf-8">
  <meta name="viewport" content="width=device-width, initial-scale=1">

  <title>GeoPhoto</title>
  <link rel="stylesheet" type="text/css" href="main.css">
  <link rel='shortcut icon' type='image/x-icon' href='favicon.ico' />
</head>

<body>
  <div id="map"></div>
  <div id="lightgallery"></div>
  <script type="module" src="main.js"></script>
</body>

</html>
You can optionally copy a favicon.ico into src. At this point, the project structure matches the current application.
3. Google Maps 
Every project that integrates the Google Maps JavaScript API needs an API key. Because this version uses @googlemaps/js-api-loader, we no longer load Google Maps with a <script> tag in index.html. Instead, the application loads the API from JavaScript.
I recommend storing the API key in a Vite environment file.
VITE_GOOGLE_MAPS_API_KEY=your_api_key
VITE_GOOGLE_MAP_ID=DEMO_MAP_ID
The map ID is required for advanced markers. For local experiments, DEMO_MAP_ID is sufficient. For production, create your own map ID in the Google Cloud console.
Add the map container to index.html as shown above and style it in main.css.
#map {
  position: absolute;
  top: 10px;
  bottom: 10px;
  left: 10px;
  right: 10px;
}
In main.js, initialize the Google Map as shown here:
import { importLibrary, setOptions } from '@googlemaps/js-api-loader';
import { MarkerClusterer } from '@googlemaps/markerclusterer';
import { format } from 'date-fns';
import 'lightgallery.js';
import 'lg-fullscreen.js';
import 'lg-autoplay.js';
import 'lg-zoom.js';

const GOOGLE_MAPS_API_KEY = import.meta.env.VITE_GOOGLE_MAPS_API_KEY || 'AIzaSyAZjJ216B4aJGdXTwXNevmXesob9RUSlPc';
const GOOGLE_MAP_ID = import.meta.env.VITE_GOOGLE_MAP_ID || 'DEMO_MAP_ID';

let map;
let AdvancedMarkerElement;
const markers = [];

initialize();

async function initialize() {
  setOptions({
    key: GOOGLE_MAPS_API_KEY,
    v: 'weekly'
  });

  const [{ Map }, { AdvancedMarkerElement: LoadedAdvancedMarkerElement }] = await Promise.all([
    importLibrary('maps'),
    importLibrary('marker')
  ]);

  AdvancedMarkerElement = LoadedAdvancedMarkerElement;

  const latLng = { lat: 14.0290853, lng: 98.0161546 };

  const mapOptions = {
    center: latLng,
    zoom: 10,
    mapId: GOOGLE_MAP_ID,
    mapTypeId: 'hybrid'
  };

  map = new Map(document.getElementById('map'), mapOptions);
  await loadPhotos();
}
Change the center coordinates to match your own photo collection. During development, start the app with npm run dev. Vite opens the browser automatically and usually serves the app on http://localhost:5173.
4. Markers 
This implementation uses Google Maps Advanced Markers and passes a DOM element as marker content.
Add the following CSS to main.css to style the marker icon.
/* Outside white border */
.asset-map-image-marker {
  background-color: gold;
  box-sizing: border-box;
  border-radius: 5px;
  cursor: pointer !important;
  display: block;
  height: 50px;
  padding: 0px;
  position: relative;
  width: 40px;
}

/* Arrow on bottom of container */
.asset-map-image-marker:after {
  border-color: #ffffff transparent;
  border-style: solid;
  border-width: 10px 10px 0;
  bottom: 0;
  content: '';
  display: block;
  left: 10px;
  position: absolute;
  width: 0;
}

/* Inner image container */
.asset-map-image-marker div.image {
  background-position: center center;
  background-size: cover;
  border-radius: 5px;
  height: 36px;
  margin: 2px;
  width: 36px;
}
When you display many markers, the map quickly becomes cluttered. The current code therefore uses @googlemaps/markerclusterer.
npm install @googlemaps/markerclusterer
We also use date-fns to format the photo timestamp for the tooltip.
npm install date-fns
Now we can load the JSON file and create the markers.
import { MarkerClusterer } from '@googlemaps/markerclusterer';
import { format } from 'date-fns';
let map;
let AdvancedMarkerElement;
const markers = [];
async function loadPhotos() {
  const response = await fetch('assets/photos.json');
  if (!response.ok) {
    throw new Error(`Failed to load assets/photos.json: ${response.status} ${response.statusText}`);
  }

  const contentType = response.headers.get('content-type') || '';
  if (!contentType.includes('application/json')) {
    throw new Error(`Expected JSON from assets/photos.json but received ${contentType || 'unknown content type'}`);
  }

  const photos = await response.json();
  for (const photo of photos) {
    drawMarker(photo);
  }
  new MarkerClusterer({
    map,
    markers,
    algorithmOptions: {
      minPoints: 20
    }
  });
}

function drawMarker(photo) {
  const markerContent = document.createElement('div');
  markerContent.className = 'asset-map-image-marker';
  markerContent.title = photo.ts ? format(new Date(photo.ts * 1000), 'yyyy-MM-dd HH:mm') : '';

  const image = document.createElement('div');
  image.className = 'image';
  image.style.backgroundImage = `url(assets/thumbnails/${photo.img})`;
  markerContent.appendChild(image);

  const marker = new AdvancedMarkerElement({
    map,
    position: { lat: photo.lat, lng: photo.lng },
    title: markerContent.title,
    content: markerContent,
    gmpClickable: true
  });
  marker.photo = photo.img;

  marker.addEventListener('gmp-click', () => {
    const el = document.getElementById('lightgallery');
    const lg = window.lgData[el.getAttribute('lg-uid')];
    if (lg) {
      lg.destroy(true);
    }
    lightGallery(el, {
      dynamic: true,
      dynamicEl: visiblePhotos(photo)
    });
  });

  markers.push(marker);
}
The loadPhotos() function fetches photos.json, validates that the server really returned JSON, and then creates one marker per photo. After that, the application hands all markers to the clusterer and tells it to create a cluster only when at least 20 markers overlap.
5. Image Gallery 
When the user clicks a marker, the application should open the full-size image and allow browsing through all photos currently visible on the map. For this feature, the current project uses lightGallery.
Install the main library and the plugins:
npm install lightgallery.js
npm install lg-autoplay.js
npm install lg-fullscreen.js
npm install lg-zoom.js
Import the CSS in main.css.
@import '../node_modules/lightgallery.js/dist/css/lightgallery.css';
Import the library and plugins in main.js.
import 'lightgallery.js';
import 'lg-fullscreen.js';
import 'lg-autoplay.js';
import 'lg-zoom.js';
When the marker is clicked, we destroy any existing gallery instance and create a new gallery that contains the clicked image and every other image currently inside the visible map bounds.
  marker.addEventListener('gmp-click', () => {
    const el = document.getElementById('lightgallery');
    const lg = window.lgData[el.getAttribute('lg-uid')];
    if (lg) {
      lg.destroy(true);
    }
    lightGallery(el, {
      dynamic: true,
      dynamicEl: visiblePhotos(photo)
    });
  });
The helper function that builds the gallery input looks like this:
function visiblePhotos(photo) {
  const bounds = map.getBounds();
  const result = [{ src: `assets/images/${photo.img}` }];
  if (!bounds) {
    return result;
  }

  for (const marker of markers) {
    if (bounds.contains(markerPosition(marker))) {
      if (photo.img !== marker.photo) {
        result.push({ src: `assets/images/${marker.photo}` });
      }
    }
  }
  return result;
}

function markerPosition(marker) {
  if (marker.position instanceof google.maps.LatLng) {
    return marker.position;
  }

  return new google.maps.LatLng(marker.position);
}
The code starts with the photo the user clicked on, then loops over all markers and checks if the marker position is inside the current map bounds. This way the gallery is always contextual to the part of the map the user is looking at.
6. Build 
When everything is implemented, create the production build with npm run build.
To test the production build locally, run npm run preview. Vite serves the generated dist folder and opens it in the browser.
If everything looks good, you can deploy the contents of the dist folder to any HTTP server. You can deploy the application to one of the many static web hosting providers if you don't manage your own server on the internet. A web search for "static web hosting" lists many providers you can choose from.
That concludes this tutorial about creating a JavaScript application that presents your photos on Google Maps.